
Wood Furniture Painting Made Easy: Professional Tips for Lasting Results
Painting wood furniture is one of the most effective ways to refresh a home, upgrade a kitchen, or add personality to a building interior. Whether you’re transforming kitchen cabinets, refinishing a desk, or matching a new installation to your décor, the right preparation and products make all the difference. This guide breaks down the process into simple, professional steps—so you can achieve a smooth, durable finish that stands up to daily use.
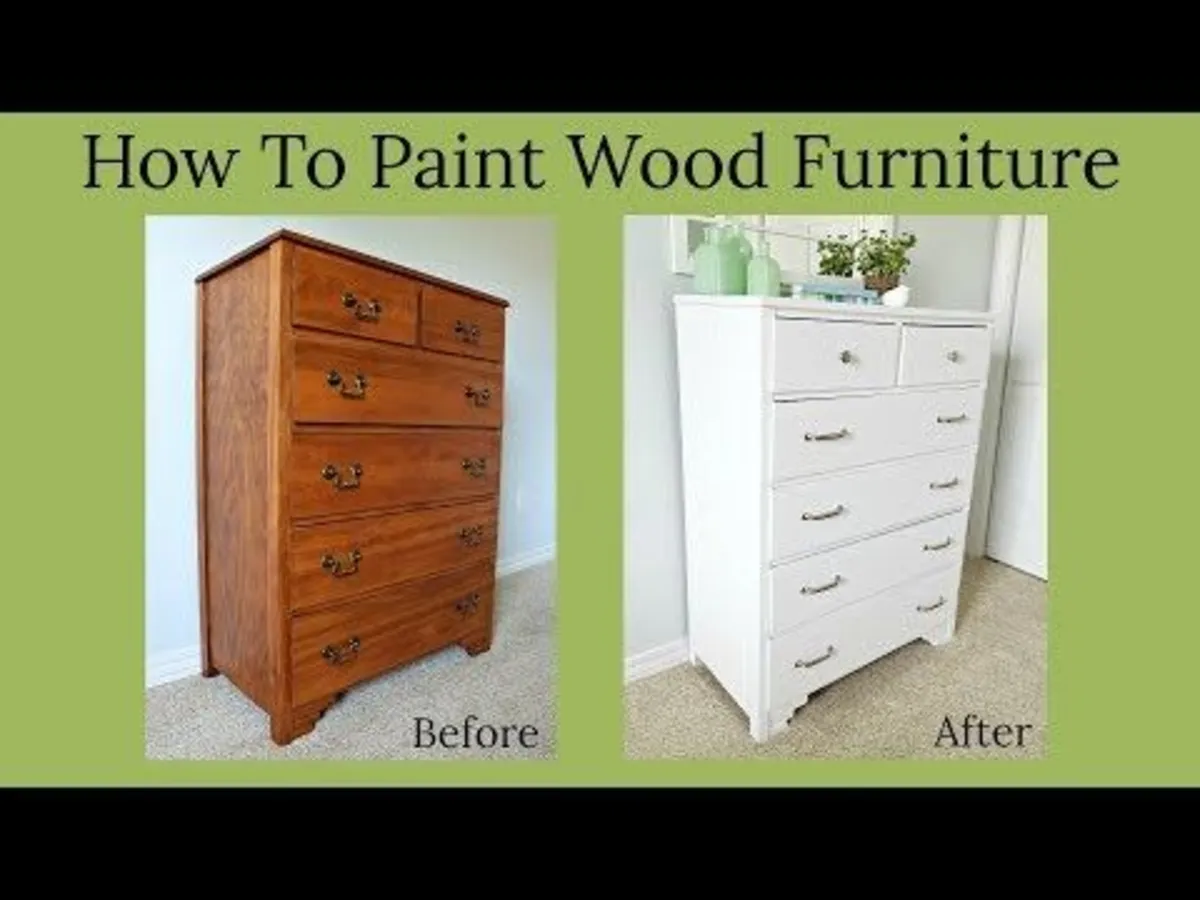
Why Refinish Instead of Replace?
Quality wood furniture and cabinets are built to last. But over time, finishes fade, chip, or simply fall out of style. Repainting allows you to:
- Refresh your room without spending on brand-new cabinets.
- Match custom pvc board trim or other interior materials.
- Protect the wood from moisture, UV light, and wear.
- Experiment with color trends without long-term commitment.
With the right approach, a painted finish can look as sleek as a factory-applied coating—while giving you full control over style.
Step 1: Assess the Surface
Before reaching for the brush, inspect your furniture:
Solid Wood vs. Veneer: Solid wood can be sanded more aggressively, while thin veneers need lighter preparation to avoid damage.
Existing Finish Condition: Glossy coatings will need more surface roughing for paint adhesion.
Hardware & Hinges: Remove knobs, pulls, and hinges for cleaner results—especially on kitchen cabinets where precision matters.
If you’re working with a mixed-material piece that includes pvc board elements, adjust prep accordingly; PVC requires light sanding and a specialized primer.
Step 2: Prepare Like a Pro
Preparation is where most DIYers fall short, and where professionals excel.
Clean Thoroughly: Degrease with a mild detergent or a trisodium phosphate (TSP) substitute. This is crucial for kitchen cabinets, which often have a buildup of cooking oils.
Sand the Surface: Use 120–150 grit sandpaper to dull the existing finish. On PVC board components, sand lightly—just enough to help primer grip.
Fill Imperfections: Use a quality wood filler for scratches, dents, or old screw holes. Once dry, sand smooth.
Dust Removal: Wipe down with a tack cloth to remove sanding residue.
Proper preparation guarantees the paint bonds smoothly and prevents flaking.
Step 3: Prime for Perfection
Skipping primer is a time-saver that almost never delivers results. A good primer:
- Seals porous surfaces for uniform paint absorption.
- Blocks tannin bleed-through from certain woods.
- Provides a bonding layer for difficult materials like PVC.
For wooden furniture, a primer with strong adhesion and stain-blocking properties works best. On PVC board parts, use a multi-surface or plastic primer formulated for non-porous substrates. Allow the primer to dry fully before painting—typically 24 hours for oil-based, 4–6 hours for water-based.
Step 4: Choose the Right Paint
The best paint for furniture depends on the look and durability you want:
Acrylic Latex: Easy cleanup, fast drying, low VOC. Great for most interior furniture and cabinets.
Oil-Based Enamel: Superior hardness and durability, excellent for kitchen cabinets in high-use areas. Longer drying time.
Hybrid Alkyds: Water-based yet as durable as oil, combining the advantages of both types.
Gloss and semi-gloss finishes are easier to clean and more resistant to moisture—key for kitchens and bathrooms.
Step 5: Application Techniques
A flawless finish comes down to even application:
Spraying: Professional sprayers deliver the smoothest finish with no brush marks. Ideal for larger projects like full cabinet sets.
Rolling & Brushing: Use high-quality synthetic brushes and foam rollers. Apply with steady, continuous strokes, maintaining a wet edge to prevent streaks or overlaps.
Multiple Thin Coats: Two to three thin coats outperform one heavy coat in durability and appearance.
Lightly sand with 220–320 grit paper between coats to eliminate dust particles, then wipe the surface clean.
Step 6: Curing & Final Touches
Paint may feel dry to the touch in a few hours, but full curing—when it hardens completely—can take several days or even weeks. Avoid heavy use during this period, especially for kitchen cabinets and tabletops.
Once cured:
- Reinstall hardware.
- Add felt pads to prevent scratches.
- Enjoy a refreshed piece that looks professionally finished.
Pro Tip: Blending Wood and PVC
Many modern kitchens and built-ins combine painted wood with pvc board shelving or trim. To ensure a seamless appearance:
Match primer and paint across materials for consistent sheen.
Test color samples on both surfaces before committing.
Use flexible caulk at joints to prevent cracking as materials expand and contract differently.
Final Word
Painting wood furniture is a skill that pays for itself—especially when working on high-value pieces like kitchen cabinets or custom shelving. With careful preparation, quality primers, and the right paint, you can achieve a finish that rivals new furniture. Whether you’re updating a single chair or an entire kitchen, the process is straightforward when you follow professional standards.
Fresh color, renewed protection, and a polished look—painting is the smart way to extend the life and beauty of your wood furniture while integrating modern materials like toko pvc board into your design.